Getting started with GitLab CI/CD
Note: Starting from version 8.0, GitLab Continuous Integration (CI) is fully integrated into GitLab itself and is enabled by default on all projects.
GitLab offers a continuous integration service. If you
add a .gitlab-ci.yml file to the root directory of your repository,
and configure your GitLab project to use a Runner, then each commit or
push, triggers your CI pipeline.
The .gitlab-ci.yml file tells the GitLab runner what to do. By default it runs
a pipeline with three stages: build, test, and deploy. You don't need to
use all three stages; stages with no jobs are simply ignored.
If everything runs OK (no non-zero return values), you'll get a nice green checkmark associated with the commit. This makes it easy to see whether a commit caused any of the tests to fail before you even look at the code.
Most projects use GitLab's CI service to run the test suite so that developers get immediate feedback if they broke something.
There's a growing trend to use continuous delivery and continuous deployment to automatically deploy tested code to staging and production environments.
So in brief, the steps needed to have a working CI can be summed up to:
- Add
.gitlab-ci.ymlto the root directory of your repository - Configure a Runner
From there on, on every push to your Git repository, the Runner will automagically start the pipeline and the pipeline will appear under the project's Pipelines page.
This guide assumes that you:
- have a working GitLab instance of version 8.0+r or are using GitLab.com
- have a project in GitLab that you would like to use CI for
Let's break it down to pieces and work on solving the GitLab CI puzzle.
Creating a .gitlab-ci.yml file
Before you create .gitlab-ci.yml let's first explain in brief what this is
all about.
What is .gitlab-ci.yml
The .gitlab-ci.yml file is where you configure what CI does with your project.
It lives in the root of your repository.
On any push to your repository, GitLab will look for the .gitlab-ci.yml
file and start jobs on Runners according to the contents of the file,
for that commit.
Because .gitlab-ci.yml is in the repository and is version controlled, old
versions still build successfully, forks can easily make use of CI, branches can
have different pipelines and jobs, and you have a single source of truth for CI.
You can read more about the reasons why we are using .gitlab-ci.yml in our
blog about it.
Creating a simple .gitlab-ci.yml file
Note:
.gitlab-ci.ymlis a YAML file so you have to pay extra attention to indentation. Always use spaces, not tabs.
You need to create a file named .gitlab-ci.yml in the root directory of your
repository. Below is an example for a Ruby on Rails project.
before_script:
  - apt-get update -qq && apt-get install -y -qq sqlite3 libsqlite3-dev nodejs
  - ruby -v
  - which ruby
  - gem install bundler --no-ri --no-rdoc
  - bundle install --jobs $(nproc)  "${FLAGS[@]}"

rspec:
  script:
    - bundle exec rspec

rubocop:
  script:
    - bundle exec rubocop
This is the simplest possible configuration that will work for most Ruby applications:
- Define two jobs
rspecandrubocop(the names are arbitrary) with different commands to be executed. - Before every job, the commands defined by
before_scriptare executed.
The .gitlab-ci.yml file defines sets of jobs with constraints of how and when
they should be run. The jobs are defined as top-level elements with a name (in
our case rspec and rubocop) and always have to contain the script keyword.
Jobs are used to create jobs, which are then picked by
Runners and executed within the environment of the Runner.
What is important is that each job is run independently from each other.
If you want to check whether your .gitlab-ci.yml file is valid, there is a
Lint tool under the page /ci/lint of your GitLab instance. You can also find
a "CI Lint" button to go to this page under CI/CD ➔ Pipelines and
Pipelines ➔ Jobs in your project.
For more information and a complete .gitlab-ci.yml syntax, please read
the reference documentation on .gitlab-ci.yml.
Push .gitlab-ci.yml to GitLab
Once you've created .gitlab-ci.yml, you should add it to your Git repository
and push it to GitLab.
git add .gitlab-ci.yml
git commit -m "Add .gitlab-ci.yml"
git push origin master
Now if you go to the Pipelines page you will see that the pipeline is pending.
You can also go to the Commits page and notice the little pause icon next to the commit SHA.

Clicking on it you will be directed to the jobs page for that specific commit.
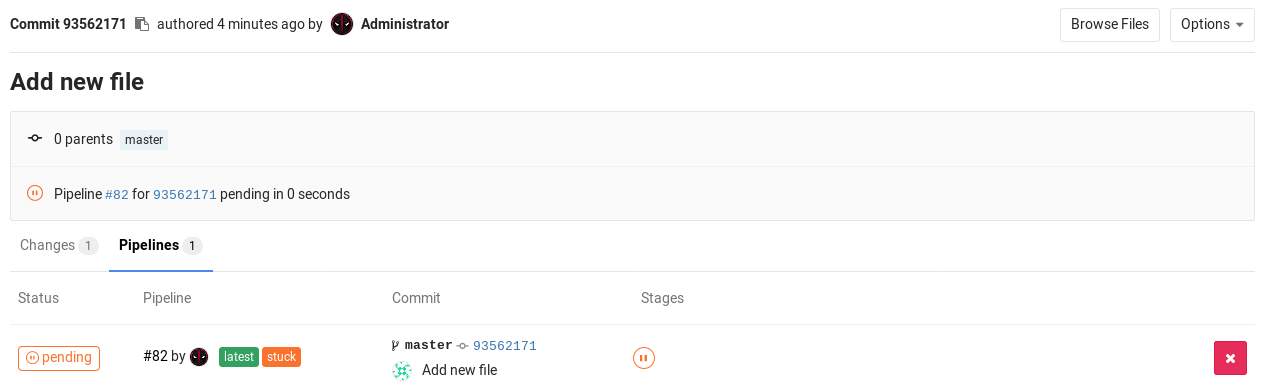
Notice that there are two jobs pending which are named after what we wrote in
.gitlab-ci.yml. The red triangle indicates that there is no Runner configured
yet for these jobs.
The next step is to configure a Runner so that it picks the pending jobs.
Configuring a Runner
In GitLab, Runners run the jobs that you define in .gitlab-ci.yml. A Runner
can be a virtual machine, a VPS, a bare-metal machine, a docker container or
even a cluster of containers. GitLab and the Runners communicate through an API,
so the only requirement is that the Runner's machine has Internet access.
A Runner can be specific to a certain project or serve multiple projects in GitLab. If it serves all projects it's called a Shared Runner.
Find more information about different Runners in the Runners documentation.
You can find whether any Runners are assigned to your project by going to Settings ➔ CI/CD. Setting up a Runner is easy and straightforward. The official Runner supported by GitLab is written in Go and its documentation can be found at https://docs.gitlab.com/runner/.
In order to have a functional Runner you need to follow two steps:
Follow the links above to set up your own Runner or use a Shared Runner as described in the next section.
Once the Runner has been set up, you should see it on the Runners page of your project, following Settings ➔ CI/CD.
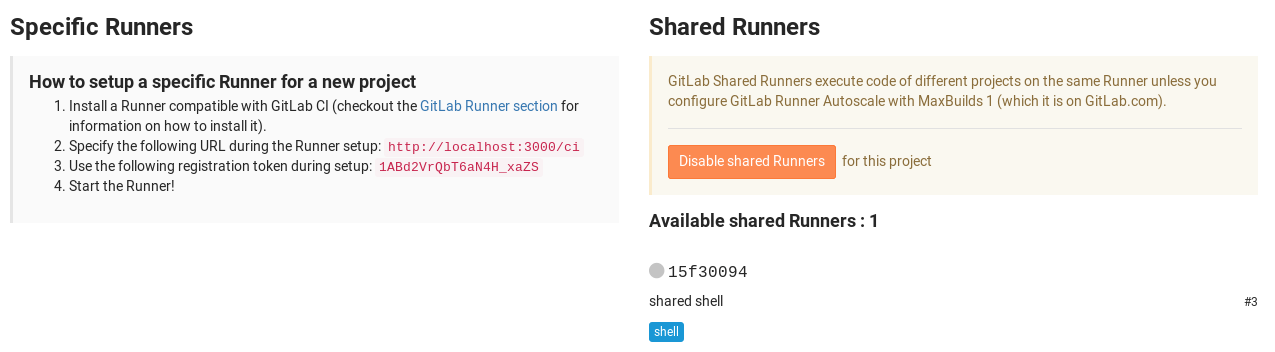
Shared Runners
If you use GitLab.com you can use the Shared Runners provided by GitLab Inc.
These are special virtual machines that run on GitLab's infrastructure and can build any project.
To enable the Shared Runners you have to go to your project's Settings ➔ CI/CD and click Enable shared runners.
Seeing the status of your pipeline and jobs
After configuring the Runner successfully, you should see the status of your last commit change from pending to either running, success or failed.
You can view all pipelines by going to the Pipelines page in your project.
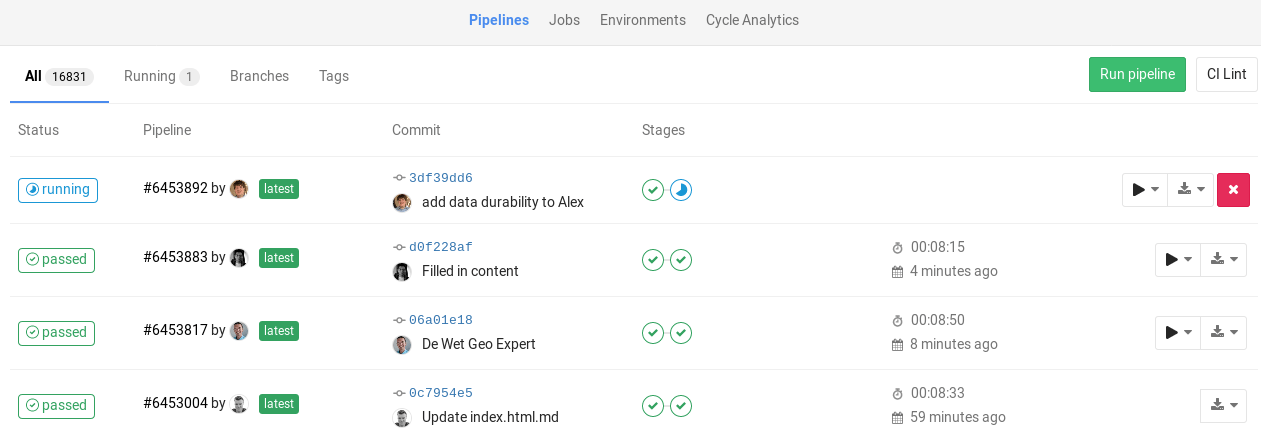
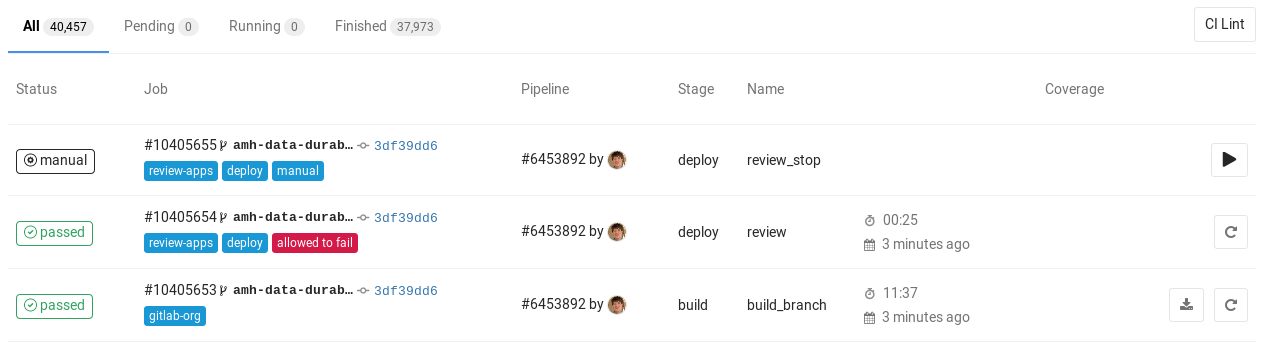
Or you can view all jobs, by going to the Pipelines ➔ Jobs page.
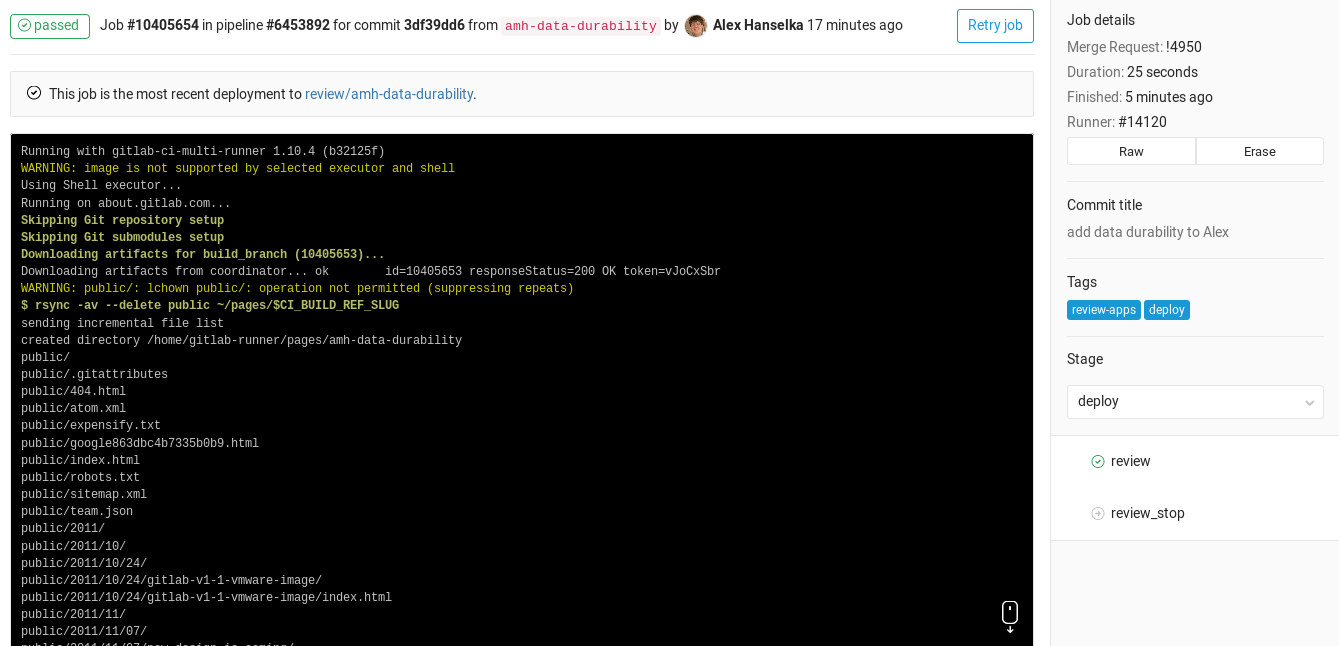
By clicking on a job's status, you will be able to see the log of that job. This is important to diagnose why a job failed or acted differently than you expected.
You are also able to view the status of any commit in the various pages in GitLab, such as Commits and Merge requests.
Examples
Visit the examples README to see a list of examples using GitLab CI with various languages.